Importing data from text files |
  
|
Importing data from text files |
|
In order to import optical constant data from text files you must create input files of a certain structure. You can import dielectric functions or refractive index data. In both cases, the files must consist of three columns. The first column contains the spectral position (wavelength, wavenumber, frequency, ...), the second and third columns the real and the imaginary part, respectively. The columns must be separated by spaces or tab stops. Floating point numbers must be stored using decimal points, independent of the regional settings in your Windows system.
No header line and no line after the last data point is allowed.
Here is an example for n and k data:
400 2.408627033 0.4156653583
410 2.411873579 0.3820514381
420 2.412563324 0.3499037027
430 2.41097641 0.3193621635
440 2.40746069 0.2905050516
450 2.402238846 0.2634026408
460 2.395607471 0.2380614579
470 2.387810707 0.2144837677
480 2.378987789 0.1926633567
490 2.369399548 0.1725632399
500 2.359213591 0.1541357189
510 2.348565817 0.1373167932
520 2.337641954 0.1220459864
530 2.326568365 0.10827066
540 2.315360069 0.09589903057
550 2.304250717 0.08483409137
560 2.293296814 0.07504497468
570 2.282603025 0.06639868021
580 2.272218227 0.0588131547
590 2.262247324 0.05217254534
600 2.252709866 0.04636290297
610 2.24363637 0.04127727076
620 2.234975576 0.036819987
630 2.226799965 0.03293710575
640 2.219054222 0.02952171676
650 2.211731434 0.02650727145
660 2.204816103 0.02387103066
670 2.198265076 0.02153578214
680 2.192091942 0.01947694644
690 2.18625164 0.01764915884
700 2.180743456 0.01603478752
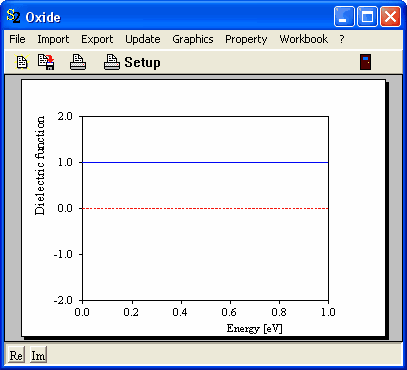
Once you have created a new object of type 'Imported dielectric function' in your material list, open its window which should look like this initially:
In order to import optical constant data from a text file, use the Import command and select the file you want to read from. At the bottom of the file dialog you can select the file type. Choose 'Data table (x, real, imag)' if you want to import dielectric function data, and select 'n and k from data table (x,n,k)' if the file contains complex refractive index data.
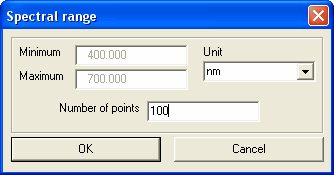
SCOUT reads the file line by line and determines the spectral range covered by the data. The following dialog gives you a chance to set the proper spectral unit:

In this case the spectral range is given in nanometers, so the 'eV' should be changed to 'nm'.
In addition, you can change the number of spectral points in the dialog. SCOUT gives the number of points found in the file. SCOUT always works with equidistant spectral positions. If the data in the file are non-equidistant, SCOUT will create an equidistant grid of spectral positions covering the found spectral range. If you don't change the number of points, it will use as many points as found in the file. The optical constant data on this equidistant grid of spectral positions are obtained by linear interpolation of the original non-equidistant data points. If there are large differences in the spectral distances of the original points it might be useful to increase the number of points of the equidistant grid.
Having changed the spectral unit to 'nm' and the number of points to '100' the dialog looks like this:
Press OK and then 'a' to autoscale the graphics. Note that the new 'Imported dielectric function' object might not display the complex refractive index but the dielectric function:

If you want to see the complex refractive index, use the Property command and select 'Refractive index':

It is a good idea to permanently store the new object in your database.