Automation |
  
|
Automation |
|
Having tried different combinations of layer thicknesses, soon you will have the wish for automization. The Excel 97document CODE_Automation.xls distributed with this tutorial contains a table and some VisualBasic macros that show how you can create tables collecting the results for various thickness combinations.
Opening the file you get this (don't worry, you will not have to understand the German menu items of my Excel version):
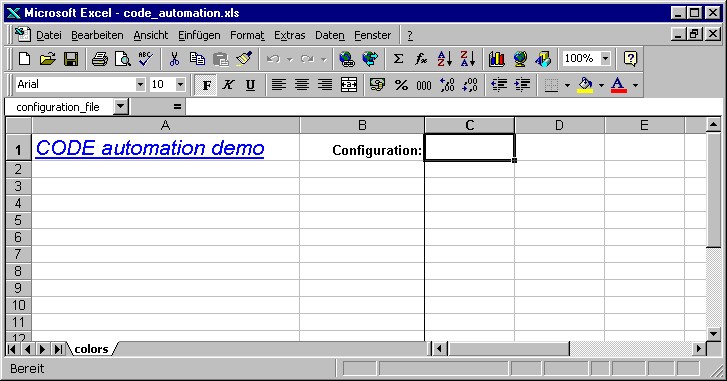
Enter the filename of the CODE configuration that you want to investigate in cell C1. For example, we could use the last configuration of this tutorial. On my filesystem I have to enter 'z:\help\code\tutorial\datafiles\tu1_ex1_step5.wcd'. Now call the macro 'start_wcd'. CODE will be started and load the configuration (if the filename is correct). In addition, Excel shows the names of all fit parameters (in this case: the layer thicknesses) and the names of the integral quantities. In column B you can enter short names for the fit parameters for easier identification of the parameters:
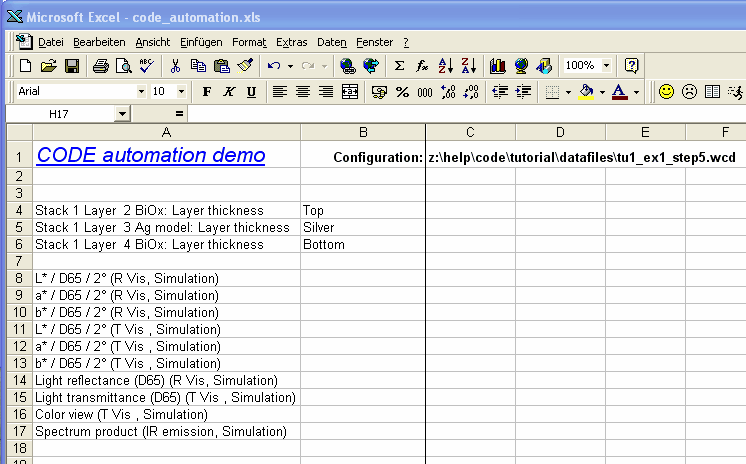
Starting in column C, you can now enter thickness values (in nm) in all kinds of combinations. You can do this by typing in the numbers or by programming the Excel table. Here is an example:
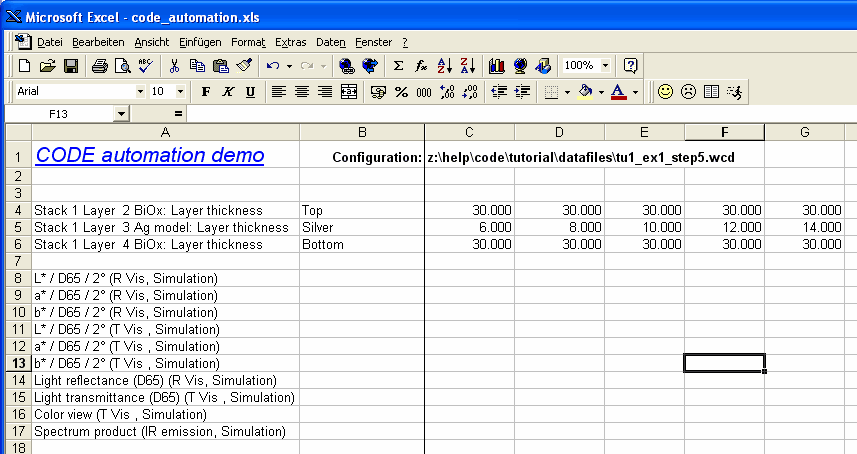
Now call the macro 'compute_values' which will control CODE to compute all the requested data. After a short while you get this:

Making use of Excel's flexibility and the OLE automation capabilities of CODE you can generate very useful tables and charts helping to design your thin film product.