Overview |
  
|
Overview |
|
The geometric objects of SPRAY are managed by the 'List of objects'. The list is opened with the button 'Objects' in the main window. Here is an example:
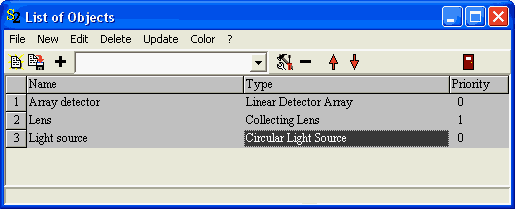
In the list, you can overwrite the name of the objects and set their priority. If, during the ray-tracing, two objects report the same distance to the starting point of the current ray, the one with the highest priority will get the order to handle this ray (see the description of the SPRAY ray-tracing algorithm).
Like in almost all lists, a double click on a row lets you select a color for the corresponding object:

Assigning colors to objects can make long lists easier readable. In addition, you can use the assigned colors of the objects for camera views. The global SPRAY option 'Use object colors for camera views' (Use the command File|Options|Use object colors for camera views in order to check or uncheck this option) is used to control the color assignment of objects in camera views: If the option is unchecked, default colors are used. Otherwise the user-defined color assignment is taken to display the objects in a view.
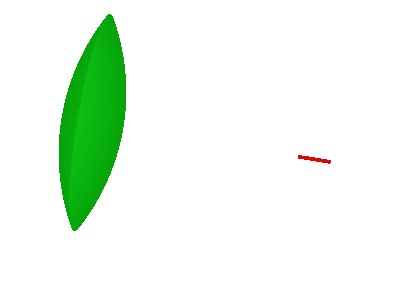
For the example configuration given above, a view with default colors looks like this:
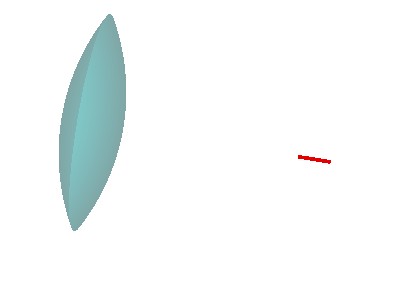
Setting the option 'Use object colors for camera views' one gets
 .
.
The available objects are classified as follows:
•Light sources (these objects emit rays)
•Detectors (these objects detect rays)
•Interface objects (these objects reflect, absorb or transmit rays. Depending on the assigned type of interface the reflection or transmission is specular or diffuse)
•Special objects (here objects are collected that do not belong to one of other the categories)
Activation / De-activation of objects
If you want to exclude an object from SPRAY simulations temporarily you can de-activate it by clicking with the right mouse button in the 2nd column of the object's row (the type column) while the shift key is pressed on the keyboard. To indicate the de-activation the object's name is displayed in brackets like the 'Array detector' in the following example:

To turn an object back into the activated state right-click again with the shift key pressed.
Copy: Duplication of objects
Any object (except the light source) in the list of objects can be duplicated by the Copy command. Since a temporary file is used during the copy action, this command only works if you have the right to write to the local drive c: on your PC.