The fastest way to get going is this:
1.
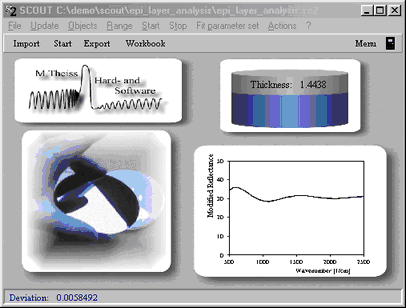
It is assumed that you have a well-tested SCOUT model that can automatically handle the input spectra you want to analyze. Start SCOUT and load the corresponding configuration. Here is a simple example used to determine the thickness of an epitaxial silicon layer:
2.
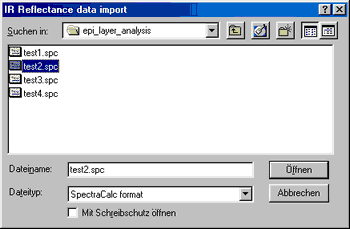
Use the Import button in the toolbar of the main window of SCOUT. You are asked to select measured data for all spectra in the list of spectra, one after the other. Our simple example has only one spectrum, so we have to import one spectrum only:
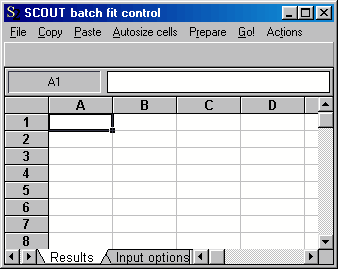
3. Open the batch control window by Actions|Show batch control in the main window of SCOUT. The batch control window is very similar to the workbook. It has three worksheets named Results, Input options and Pre-fit:
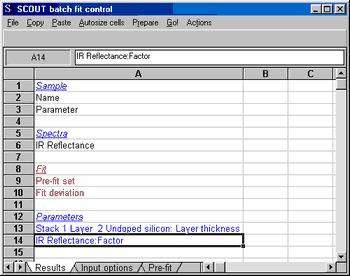
4. Execute the Prepare/New batch fit menu command. The tables are now filled as far as it is possible. The results page now looks like this:
5.
Before we enter items on the 'Results' page, we have to set some input options on the 'Input options' worksheet:

For each spectrum in the SCOUT spectrum list you can set the path where the measured spectra are located. In the column 'Input format' you identify the file format by an integer number. Use one of the following:
Some files (stored e.g. in the SCOUT standard format, the xy-format, the SpectraCalc and the HunterLab UltraScan format) may contain multiple spectra in one file. In this case the 'Input option' column gives the number of the spectrum in the file. The files are counted 1,2,3, ...
If the data files all have the same file extension it is convenient to place it into the 'Extension' column. If not, leave this column empty.
6.
Now go back to the 'Results' page:

Now it's time to enter the input data for the batch operation. You have to fill in items in the rows with black text. For each sample to be investigated you must specify a name. SCOUT will do batch fit from left to right and stop when it finds the first empty 'Name' cell.
For each sample you can specify a numerical parameter in the 'Parameter' row, but you don't have to. If you like to you can change the text 'Parameter' to something more specific. Here we take as an example the quantity 'Deposition time'.
Finally you have to enter a filename in the row labeled 'IR Reflectance'. If you have specified an input path and an extension in the 'Input options' worksheet, you can just put the pure filenames here. As an example, the table could now look like this:

If you have many filenames to enter, you can escape the typing work by using one of the following commands:
Place the cursor in the row of the spectrum for which you want to specify many input files, and select the menu command Actions/Add multiple files. You will get a file import dialog allowing you to select all files you want to process. Important for the right sequence of filenames in the batch control sheet is that you first select the last file and then, holding the Ctrl-key down, select the rest. If you have a continuous range of files in the dialog, select the last one first, hold the Shift-key down and then select the first file. This action will select all files between the last and the first. You can use wildcards like *R* in the filename editor in order to pre-select the files you see in the dialog. After you have selected the files, the path in the Input option page is adjusted if you have taken files from a different directory. It is a good idea anyway to check the setting on the input option sheet before you proceed: Selecting files with Add multiple files enters the full filenames including the file extension into the cells. In this case you should drop any entry for Extension on the Input option sheet.
You have to repeat this step for all spectra for which you have to specify input files.
Scan directory: This command will fill-in filenames completely automatic - you just have to specify a search directory. It can be used in situations where the filenames contain a text fragment that can be used to identify the corresponding spectrum in the SCOUT configuration. If, for example, there are reflectance and transmittance spectra in the search directory, and all reflectance spectra contain the text fragment 'RF' and all the transmittance spectra filenames contain 'T', you can call the reflectance spectrum in the optical model RF and the transmittance spectrum T. SCOUT will then collect all files that can be found with the wildcard '*RF*' as input files for the spectrum RF, and all files that can be found with '*T*' as input files for T.
7.
As a last preparational step you have to specify the so-called pre-fit sets which is done on the 'Pre-fit' worksheet:

In the first column you see the name of the fit parameters. SCOUT has already created a second column labeled 'Set 1'. If this worksheet has more than one column the following will happen: Before the actual fit for a sample is started, SCOUT tries all parameter sets defined on this 'Pre-fit' page and computes the fit deviation. The parameter set with the lowest deviation will be used to set the starting values of the parameters.
This means: If you have only one set like now, the fit will definitely start with these numbers. If you delete column B, the fit will start with its current fit parameters which may depend on the history of the batch operation, in particular on the last sample. This may be a wanted feature or not. It's your decision. If you specify more than one pre-fit set SCOUT will determine the best for each sample and use it as starting values.
In the present demonstration, three sets are defined as follows:
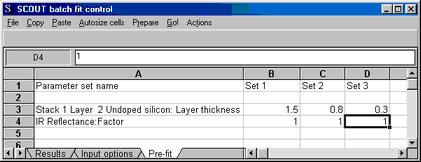
Be sure to have a name for each set. SCOUT iterates through all sets until the first empty name cell is found.
8.
That's it! Return to the 'Results' page and save the settings for safety reasons with File|SaveAs using the *.vts file format. It's now time to start the batch fit.